What is Computer ? Computer is an electronic data processing machine which accepts input data from the user, stores the input data in its memory, processes the input data according to given instructions and finally gives us the desired output. What are Data ? Data are the raw facts and figures in the form of bits and bytes. What is information ? Information is processed data. Components of Computer Computer has two components. Such as: Hardware Software What is Hardware ? All the parts of computer that we can see and touch are known as hardware. Example - Keyboard, Mouse, Monitor, etc. What is Software ? A set of statements written in a programming language is known as a instruction. A set of instructions is known as a program. A set of programs is known as a software. Example - Microsoft Windows, Adobe Photoshop, Typing Master, etc. Classification of Computers Computers can be classified into three categories. Those are: According to type of dat...
Get link
Facebook
X
Pinterest
Email
Other Apps
Get started with ASP.NET Core MVC
Get link
Facebook
X
Pinterest
Email
Other Apps
Get started with ASP.NET Core MVC
Table of Contents
This tutorial teaches ASP.NET Core MVC web development with controllers and views. If you're new to ASP.NET Core web development, consider the Razor Pages version of this tutorial, which provides an easier starting point.
This is the first tutorial of a series that teaches ASP.NET Core MVC web development with controllers and views.
At the end of the series, you'll have an app that manages and displays movie data. You learn how to:
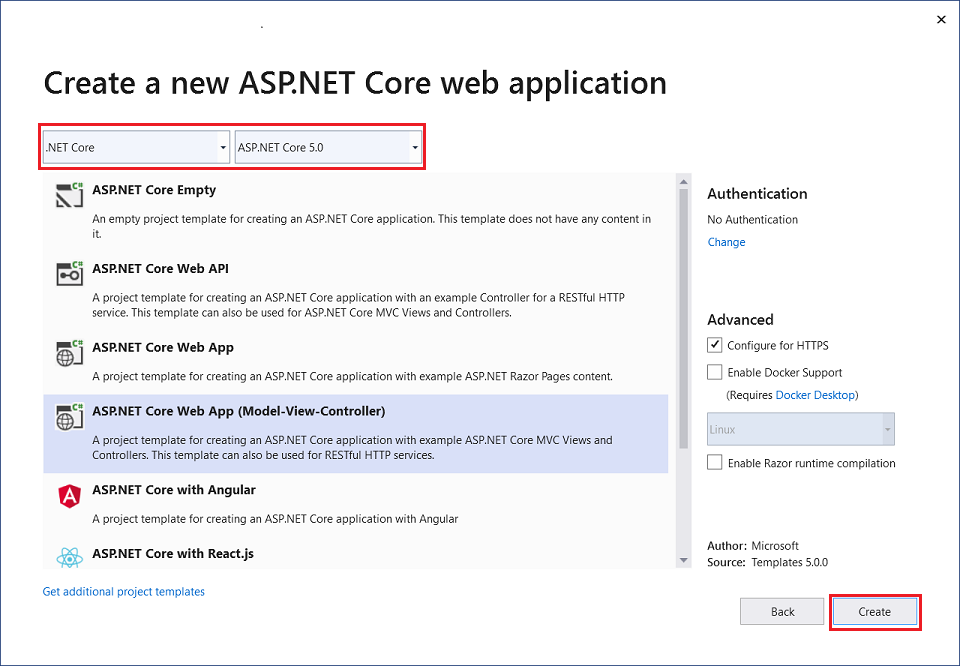
Start Visual Studio and select Create a new project.
In the Create a new project dialog, select ASP.NET Core Web Application > Next.
In the Configure your new project dialog, enter MvcMovie for Project name. It's important to name the project MvcMovie. Capitalization needs to match each namespace matches when code is copied.
Select Create.
In the Create a new ASP.NET Core web application dialog, select:
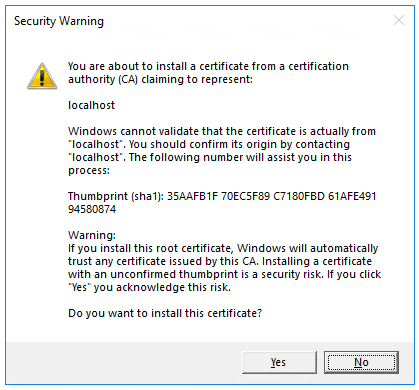
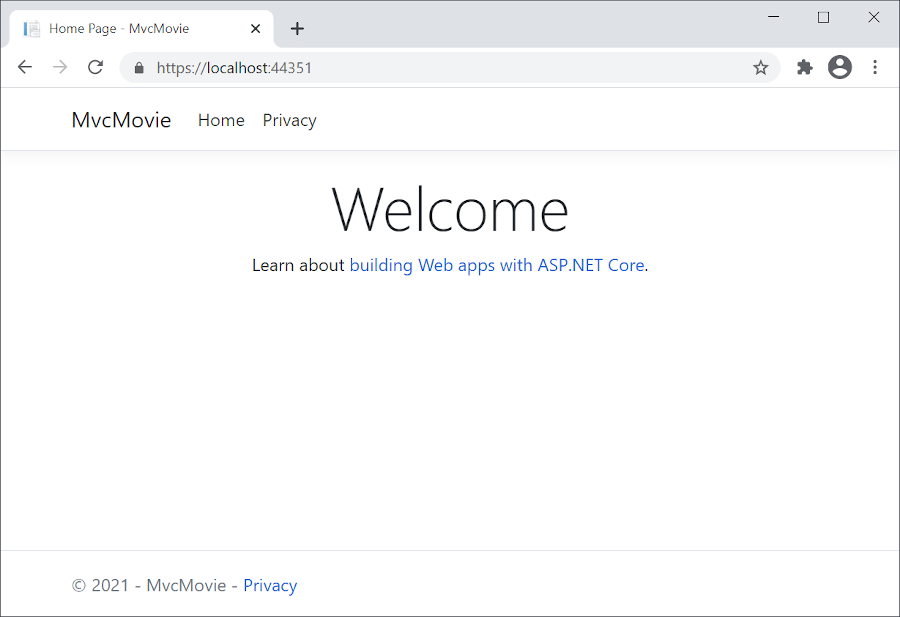
The address bar shows localhost:port# and not something like example.com. The standard hostname for your local computer is localhost. When Visual Studio creates a web project, a random port is used for the web server.
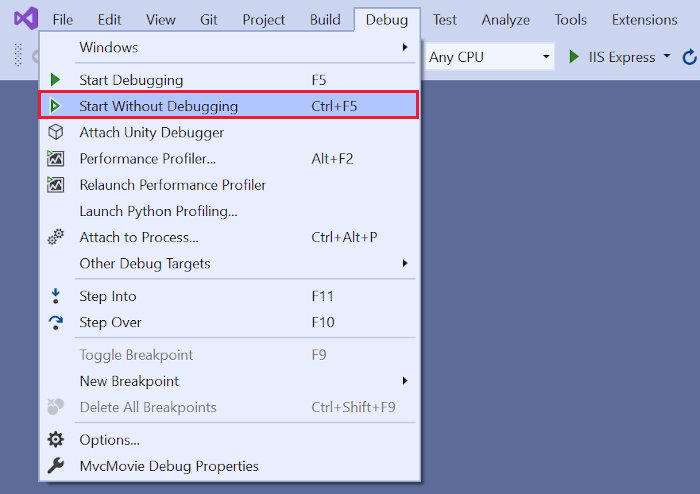
Launching the app without debugging by selecting Ctrl+F5 allows you to:
Make code changes.
Save the file.
Quickly refresh the browser and see the code changes.
You can launch the app in debug or non-debug mode from the Debug menu item:
You can debug the app by selecting the IIS Express button
How to Install Croogo CMS on Ubuntu 18.04 LTS Croogo is a free, open source Content Management System (CMS) written in PHP. It is powered by CakePHP MVC framework. Croogo CMS source code is hosted on Github. In this tutorial we will walk you through the Croogo CMS installation process on a fresh Ubuntu 18.04 LTS server. Requirements PHP 5.6 or higher MySQL 5.7 or higher Apache with mod_rewrite or Nginx Prerequisites A server running Ubuntu 18.04 A non-root user with sudo privileges. Initial steps Check the Ubuntu version: lsb_release -ds # Ubuntu 18.04 LTS Set up the timezone: timedatectl list-timezones sudo timedatectl set-timezone 'Region/City' Update your operating system’s packages: sudo apt update && sudo apt upgrade -y Install vim, git and socat packages: sudo apt install -y vim git socat Step 1 - Install PHP Install PHP and required PHP extensions: sudo apt install -y php7.2 php7.2-cli php...
Page Contents Content Management Tutorial Getting CakePHP Checking our Installation Content Management Tutorial This tutorial will walk you through the creation of a simple CMS application. To start with, we’ll be installing CakePHP, creating our database, and building simple article management. Here’s what you’ll need: A database server. We’re going to be using MySQL server in this tutorial. You’ll need to know enough about SQL in order to create a database, and run SQL snippets from the tutorial. CakePHP will handle building all the queries your application needs. Since we’re using MySQL, also make sure that you have pdo_mysql enabled in PHP. Basic PHP knowledge. Before starting you should make sure that you have got an up to date PHP version: php -v You should at least have got installed PHP 5.6 (CLI) or higher. Your webserver’s PHP version must also be of 5.6 or higher, and should be the same version your command line interface (CLI) PHP is. Getting CakePHP ...
Many individuals and businesses rely on hosting companies to keep their website and files stored and accessible. This is often a very easy and cost-effective way keep your files and webpage online, all of the time. For those of us who don’t want to pay more for a dedicated host or want to simply skip the middle man and do self-hosting, you’ll need to build your own server to house those files and allow others to connect to them. If that’s your goal, then this guide is going to help you do that. Setting up your own web server may appear to be a daunting task, but with a little know-how, it’s something that almost anyone can accomplish. Here’s what you’ll need to have/do: Obtain a Dedicated Machine Set up the Operating System Configure the OS for Web Hosting Set Up Your Self-Hosted Domain (optional) Install Monitoring Tools (optional) Add TipAsk Question STEP 1: DECIDE WHAT KIND OF SERVER YOU NEED Depending on what you are planning on using your server for, you may be able to run it...


Comments
Post a Comment